Tuesday, August 25, 2015

Dig My World Challenge


Hello Friends!
Boy it sure has been a long time since I have been here.  I am hoping to continue to blog on a weekly basis to show you all my half finished projects that are slowly getting finished :)
 
Digi My World is having a Fall challenge on their Blog, head on over and check it out, you receive a super cute file for free just for posting to the Facebook fan page.  This file is called Bushel of Memories, 2 really cute girls.
 
Copics used:
Hair - E31, E33, E35
Skin - E00, E21
Cheeks - R20
Apple - R35, R37, R59
Leaf - G00, G07, G17
Shirt - Y11, Y17
I know that some of the colors are dramatic,
I work with what I have :)
 
The candies I got from Joanns, they have tons of Halloween candy right now.  These are Carmel Apple Sugar Babies...so yummy!
 
Thank you for stopping by.
Have a blessed day!

Sunday, February 16, 2014

Lego Valentine's

The boys Valentine's were a huge hit this year. 
 
Wesley is really into Lego Marvel's right now. That is all he kept asking for, so I found this clip art on Google.  He loved it.  I used Wilton candy melts for the candies.  I purchased the Lego Mold on Amazon last year.  I bought the bags at Joanns in the candy isle.  The red cardstock is 4 1/4" x 8 ", scored at 4" to make the bag topper.
 
 
 We have all female teachers this year and I think they are all Wonder Women. So I did this for both the boys wonderful teachers.  Again, image was Googled.
 

I apologize that this picture is sideways, I cannot get it to rotate, I am having one of those days.  I saw this cute idea on Pinterest.  I am not as creative in getting my words to print onto the head so I printed on paper and then attached to the head. 
Of course we saw The Lego Movie this past weekend and my boys all loved Emmett.  I traced Emmett's face in MTC and used leftover Cricut vinyl in black and white.  Bradley had to correct me that Emmett did not have white eyes, but I think it gave the head more character.  Using vinyl to do the face was so much easier than cutting out each piece, making it into a sticker and then attaching each piece...like I normally would have done if I didn't just find a stash of leftover vinyl.  On MTC, there is a free file for a Lego guy.  I downloaded the guy and only used the head.  I then made it into a card so I could use it as a bag topper.
 
 
 The gaggle of Lego Heads, starring at me!

 
 Wesley's class is decorated bags, love that idea.  Bradley wanted to keep in the theme of Legos for his box.  I got this idea from a friend on Pinterest ...do you see a pattern, I am a Pinterest freak!
 
 
 I used some Cricut vinyl  and used Dunkin' Font for his name.  I think it kind of looks like the LEGO font.  Again, with one of those days, I could have sworn it was centered.  We used empty applesauce containers for the posts, gorilla glued them.  I bought yellow spray paint, we put on 2 coats, that did not cover up all the stuff underneath.  I used yellow acrylic paint, still did not cover it all up.  I got to the good enough point.

 
 Mott's containers.

 
It is all worth the hard work for me.  I love seeing my boys faces when they are done.  We did an assembly line the day before with 43 bags on the counter...put in 1 red Lego guy, put in 1 blue Lego guy and so on and so forth.  That was the best part, working together.

Wednesday, January 8, 2014

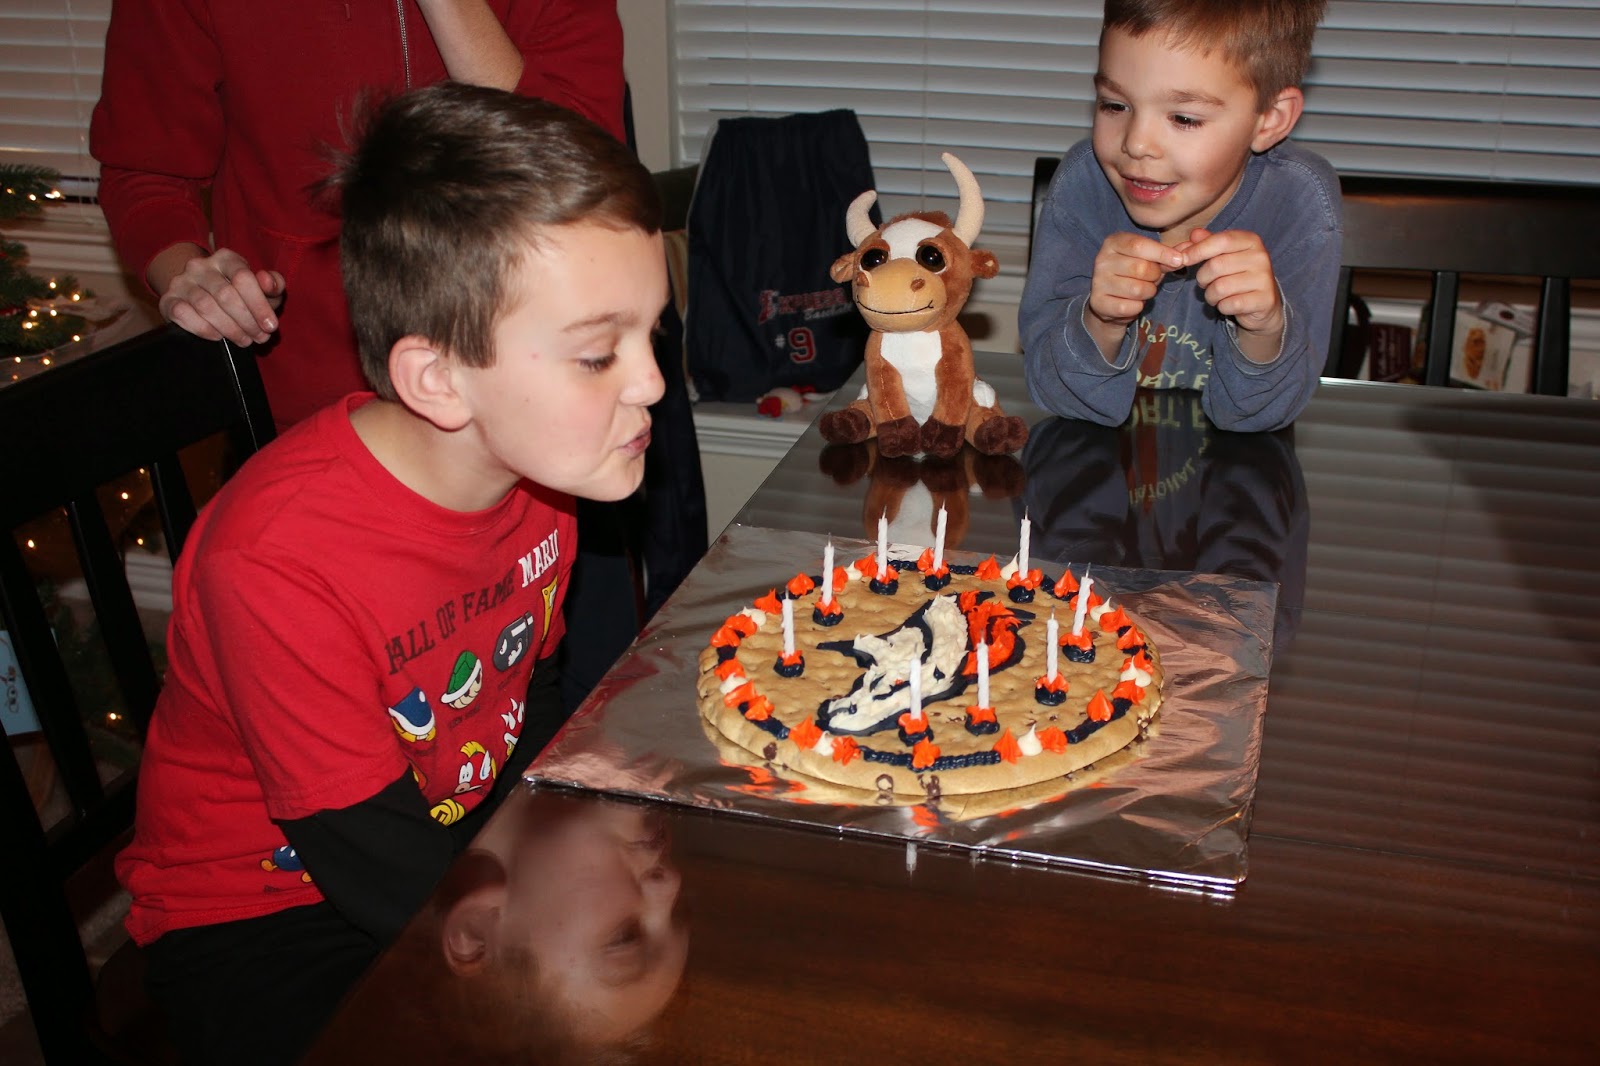
Broncos Cookie Cake

Our middle, Bradley, loves the Broncos.  It is hard to swallow seeing how we are such HUGE Patriots fans, but when Wes Welker joined them this year, we accepted Brad's obsession with Peyton and the Broncos.  We actually root for them  now...unless they are playing the Pats!
 
For Bradley's 9th birthday, all he wanted was a cookie cake.  I have never made a cookie cake.  I found a wonderful recipe on Pinterest.  Oh my goodness, it tastes just like the cookie dough from cookie dough ice cream, highly recommend this.  The only thing that I did different was the baking.  I put parchment paper on a baking stone and baked for 14 minutes.
 
 
It turned out gorgeous, I just wanted a huge glass of milk at this point.


 I decided that I would do the Bronco.  On my Silhouette Cameo, I traced and cut this image out.

 
I love using gel from HL for coloring.  I used royal blue and a couple of drops of black to get this color of frosting.  I spread the frosting and then lifted the black cardstock.
 I am not a huge fan of buttercream frosting, so I always buy the frosting in a can.
 
 
It came out so perfect I wanted to cry.

 
Next I laid down this cut to do the color frosting.  I piped it in with a Ziploc bag.  Used toothpicks to pick it up very carefully.
 
 
Again, was so pleased with myself.
 
 
This is the final product.  I went piping happy.  I also freaked out, "How am I going to stick candles in a cookie cake?"  EXTRA frosting!!!!  Put dots of frosting to stand up candles, worked amazing.
 
 
He came home from school and his reaction to the cookie cake made it all worth it!
 
***Little Tip***
Eat with Ice Cream!!! Delicious!!!


Thursday, May 30, 2013

Popcorn Teacher Gift

It is that time of year again...teachers gifts!
For Wesley's Preschool teachers, I chose to do a Popcorn Bucket.
I purchased the buckets at the $ store. 
In the buckets, I added tons of movie candy, popcorn and a gift card to a movie theatre.
Along with a card from Wesley.
My baby graduates tomorrow.  I know it is only preschool, but that means all my baby's will be in school next year.

Wednesday, May 8, 2013

5th Grade Graduation Banner

I have had such a response to 5th Grade Graduation Tissues, I thought I would post the banner I made.
There were 3 total "Congratulations", "We are Proud of You" and "Way to Go" (the third I did not take a picture of).
 
 
I used Mickey Font Cricut Cartridge for the lettering.  Each letter was done at 11 1/2".  There are 2 layers Shadow and Regular.  I cut out little stars from a CM punch to fill in the blank spaces.  The Graduation Caps are cut from Locker Talk.  I have a roll of white butcher paper that I purchased at HL with my 40% coupon. 
 
Easy and simple!

Friday, May 3, 2013

Baseball Wall

My oldest is going to be 13 soon...sniff, sniff.  I wanted to do something really cool with his room.  He is a sports nut!  He watches ESPN instead of Austin and Ally.  He knows every sports player, their positions, who they play for, it is crazy, just wish he would retain school like that!  His all time favorite sport is baseball, so I knew I had to do something.
My inspiration for this wall came from Pinterest of course...totally addicted.  Simply Mom, gives the most amazing tutorial.
 
Riley's room is on the curve of our stairwell so it is hard to do clean lines.  We decided to do a 3 tone room.  His ceiling is over 10 feet and in 1 section it goes over 13 feet.  I wanted to do all the painting myself, but because I am the "Queen of Unfinished Projects"...I have a shirt and a koozie to prove it...Dave made me hire someone.  The colors we used were from Sherwin Williams: (Lower half of wall) Naval SW 6244, (Upper half of wall) Stop SW 6869 and (Ceiling and curved wall)Navajo White SW 6126
 Now that the walls were painted, it was my turn to be crafty.
 
 I used a beige paint that I had left over for the seams.  I tried drawing lightly with a pencil, but when I stood back I could not see it.  So I painted over those pencil lines...and then repainted where there were no pencil lines.
 This is it after touching up with the white...except in the top left corner :)
After 1st coat of everything...thought I was done...nope!
 
I used Craftsmart Holiday Red Acrylic paint from Michaels.  Bought it on clearance after Christmas for $.25 a bottle.   I measured the top of the stitches at 3 inches.  I used a makeup wedge to paint the first coat of the stitches, worked like a charm. I then used a shader paint brush that was the same width as the makeup wedge to do my second coat.  I was not going to do "holes", but it finished off the look.  I used the same beige as the seams.

See the curve in the wall?
 
 
This is the finished project.  Riley loves it, I love it and Dave said I did an "amazing" job!  As you can see it is not perfect and from this picture it looks really curvy, but it is not that curvy!  I did it myself and I am so pleased with the way it turned out!
 
Little tip on this project, do it when kids are not around!!!!! It is not a weekend warrior job. You need to have patience to walk away and come back to it. Do not beat yourself up if it is not perfect. Only you are looking for the imperfections, the finished project will be amazing!

Tuesday, April 23, 2013

"Who's, Who's" of Boys Clothes

I feel like I do laundry 24/7 for 3 boys...especially my oldest who likes to change 3 times a day!  Now that they are growing up and constantly receiving hand me downs, I have adopted the
 Dot System!


Last year, I was listening to an ADHD speaker, Dr. Susan Fletcher...she was amazing, but the thing I remembered, did not have to do with ADHD, but how she tells her 3 boys clothes apart. 
Yes, I think I am ADHD :) 
 
Your oldest gets 1 Sharpie dot on the tag
Your middle gets 2 Sharpie dots on the tag
Your youngest gets 3 Sharpie dots on the tag
SO SIMPLE!
 
Guess what happens when your oldest grows out of their clothes?  You put 1 more Sharpie dot on the tag and now there is 2...amazing right?  What happens when your middle grows out of their clothes?  You put 1 more Sharpie dot on the tag and there is 3...
I Know, Right!


Thursday, April 4, 2013

Dry Erase Organizer

 Dave and I attended a YoungLife Fundraiser a few months back.  We began talking with a couple at our table and found out they have 4 boys from 6th grade to Senior.  I asked her how she does it, I had a problem with 3.  She told me about this idea. 
 
 
I purchased this Dry Erase board at Hobby Lobby and used my coupon, cost me $6.  They had much nicer ones, but I wanted something that I could move around easy. 
On Monday night I look at the boys homework for the week and write everything down.
 
 
I have what is needed, color coded.  I was going to use colored vinyl, but I didn't have it. 
The black tape I bought at Office Depot.  It was about $1.80 a package, I used 2 different sizes. 
The vinyl I cut on my Cricut using Micky Font Cartridge.  I love that cartridge.
 
 
Finished product...this week is actually very slow for us :)
I keep this on our kitchen window seat.  The boys and I can look at it easily to see what they have going on for the week.  I have been doing this a couple of months now and it works amazing.
When we have company over, I pick it up and stash it in my laundry room.


Tuesday, February 12, 2013

Lego Candy Valentines

 As you know, my boys love Legos.  I saw that someone made crayons for a birthday party with a Lego Mold.  Had to have it because I knew I would have another Lego party in my future. 
 
I purchased these on Amazon. They came as a set.

I am an over planner. I started looking for Valentine Ideas over Christmas Break.  I found this wonderful tutorial on Sugar Swings.  She made it look so easy...it was, after my 5th batch of trying.  The boys did not mind sampling the candy!
 
I bought Walmart snack size baggies, Wilton Candy Melts from Michaels.  I cut my paper 3x5.  I used crayons and a thin Sharpie. Because I had to make 45 of them for 2 different boys, I copied the cards on a color printer.  The sayings I used were, "Let's Connect!", "Coolest Friend on the Block!" and "Greatest Teacher on the Block!"  They were really fun to make and the boys loved them.

I attached the Lego Guy to the card with a little drop of melted candy!
 
We will see if they are a hit at the parties this week!

Saturday, February 2, 2013

Copic Hair Combos

I have been on the biggest Copic Craze lately.  Went on Pinterest and started looking at things, I think it is great, my hubby thinks it is a mistake because I start locking myself in my craft room!

I love the Smash Books that people are doing for their Copic Combos.  So naturally, I had to start one...okay, I have not started yet, but I will soon.

I found these great FREE head downloads to practice on at Whimsie Doodles.  They also have boy heads, but I haven't got that far yet.

I found a hair color combo chart from Mad for Markers.  I love all the colors besides brown, black, red or yellow.  I do not have all the colors that she uses, but I have other color combos and it got me thinking "DO NOT SPEND ANYMORE MONEY ON COPICS! Use what you have."  So, one day when the boys were at school (and I was waiting 5 hours for the plumber), I sat down in front of the TV with a month of shows to catch up on and had a "ME" day.

I know some of these combos are not the best, but it also made me see combos I would have never used and I can also use them for clothing.  I do plan on cutting them all out for my Smash Book and putting them on the appropriate color pages.


Thanks for stopping by!